

If you’re a disc golfer, then chances are you’ve considered dyeing your discs at some point. After all, who doesn’t love a custom-colored disc? Dyeing discs is a great way to show off your personality and style on the course. Plus, it can really come in handy if you lose a disc in tall grass or in water—a brightly-colored disc is much easier to spot than a white one!
In this blog post, we’ll walk you through everything you need to know about dyeing discs, from what supplies you’ll need to how to actually do the process. I’ve included some easy links to buy on Amazon so let’s get started!
The Disc Dyeing Process Explained in 30 seconds:
To custom dye a disc golf disc. First, you’ll need a disc in a lighter color in a plastic that will take to the dye mixture — See Plastic Dye Chart (Reddit). You’ll mix up a dye mixture and drop colors onto a bed of glue, lotion, or shaving cream. Then mix it up, dip a clean disc in and wait 24 hours. Apply some heat to speed it up. That’s it!
Disc Dyeing Equipment & Materials List
Based on your needs and the techniques you implement your materials list will vary greatly. I’ve separated this list into a basic materials list and an advanced materials list should you want to branch out.
Basic Materials:
- Container (Bed) – You’ll need to let the disc sit in a bed of the dye mixture. People use all sorts of containers here. The two most popular are:
- Cake pans – My favorite because they tend to have the least wasted materials (total amount of materials added to the pan). The nonstick versions help for cleanup. I don’t like the disposable ones because of the waste. My only gripe is that darker colored pans make it difficult to see the dye in clear glue beds, but some come with parchment paper inserts. Keep in mind discs are about 8.5″ in diameter.
- Sport Frisbee – Another classic way to lay a disc down is right in another frisbee. I find that Ultimate discs are a bit large. So I go for the smaller “sport” ones.
- Dye – Not all dyes are created equal. Note, you can mix your dyes to get a variety of colors. So don’t feel you need to buy them ALL.
- ProChem – By far the most popular and best dye to use is ProChem. They make a full line of Disc Golf Dye. If you’re just dipping your toes in the water, you can pick up a sample set on Amazon for a fraction of the cost.
- iDye Poly – Black is probably the most commonly cited color dyers use from iDye. The packets come with a color enhancer that a lot of people collect and set aside to add to lotion dyes. So don’t throw those away. iDye is also popular for those that want to dip a disc to outline a stencil.
- Rit Dye – Personally, I haven’t used Rit (I have it, but haven’t experimented with it yet) but I know people do. It’s a popular and widely available dye. I believe you need synthetic but I’m not sure.
- Acetone / Denatured Alcohol – You’ll need this to mix with the dyes. Wear gloves, eye protection, masks. Store them safely. Which one you use is up to you. It becomes a preference thing among seasoned dyers. Nail polish remover is fine.
- Magic Eraser – Okay not essential, but highly recommended for cleaning up and prepping your discs.
- Base (Lotion/Glue/Shaving Cream) – You’ll need to lay your dye mixtures down in some time of material. That something can be lotion, white school glue, clear school glue, shaving cream, or…?? What you decide comes down to the style of dyeing that you want to do. Personally, I’m partial to clear glue. I like the way the dye works in the glue.
- Popsicle Sticks / Toothpicks / Straw – These are all great tools for swirling your dyes one they’re in the bed.
- Paper Towels – You’re just gonna need em!
- Gloves – I highly recommend a good setup disposable gloves.
- Discs – You’ll need a disc! While white is great for colorful designs, white is not necessary for dyeing. I’ve had great success with blues, oranges and even purples. Your best bet are to find new discs as the pigment in older plastic won’t hold the dye well. Again, plastic type matters here! Check the chart for the best plastics for dyeing. DX, and D-Line will not hold color! Typically Premium plastics hold the best. I recommend trying ebay with some filters: “White disc golf discs” Shot out, OTB Discs is cool too as you can pick out your disc. Kastaplast and Innova Star plastics are great to start out on.
- Paper or Plastic Cups – I really don’t like plastic, but either will work, this will be for mixing dyes and lotions.
- Glass Dropper – If you aren’t investing in dyeing a single dropper is fine, otherwise see glass dropper bottles below. The fact is, you’re going to need to be able to transfer the dye from a vessel to the bed and a dropper works best for that.
Advanced Materials:
Great you’ve dyed a few discs, made a mess in your kitchen, and impressed your friends! Ready to up your game?
- Record Player – A record player is a great edition as it allows your to rotate the disc like lazy susan. If it’s functional you can do really cool spin dyes. Good news is you can get a functional one pretty cheap these days!
- Silicone Oil – If you’re looking to try out some cell dyes. Silicone oil is a must. Most people use 3 in 1. But there are a lot of various brands out there. Just make sure it says silicone oil. And when in doubt use 3 in 1.
- Applicator Bottles – These are great for premixing lotion dyes for cells and for other dyes. Lotion bottles make it easy to quickly dye a disc. There are a TON of different applicator bottle on the market. I always add a bit of plumbers tape to the threads of the lids to make a better seal. If you’re pouring from bottle to bed, then you may want to look for precision tip bottles.
- Glass Dropper Bottles – I repeat, glass, dropper bottles. The acetone will eat up plastic and leak, so use glass. The droppers could be considered basic too, but you could mix everything up in paper cups, so if you plan on long term dyeing, glass droppers are helpful.
- Paint brushes – Nothing too complicated here, just some brushes to spin dye on a record player.
- Cricut / Silhouette – If you’re looking to get into doig stencils, you’ll probably need a vinyl cutter like the Cricut or Silhouette.
- Handheld Torch – These are helpful in popping air bubbles that arise to the surface. Air bubbles are bad.
- Heat Lamp – These can rapidly speed up the time a disc needs to set in the base. Lots of people have varying preferences here, but I typically recommend going 1-2 hours and don’t let the disc exceed 110 degrees fahrenheit. Experiment with different heights to get the temp right.
- Infrared Thermometer Gun – If you use heat, you’ll want one of these as well to make sure you don’t have a meltdown.
- Heat Gun – A heat gun is sometimes used to move the dye around in lue of the toothpick. It can also help cells pop to the surface creating a nice effect.
- Floetrol – A popular medium for mixing with dye. Pours nicely and spreads color evenly. Popular with cell dyes, but universally handy.
Getting Started – “How to Dye a Disc”
There are a lot of ways to dye discs, so don’t think you have to do it any particular way, but the way that got me started and in turn had the best results is as follows. For this we’re using ProChem powder dyes on a clear glue bed, you could also mix your dyes into lotion for a different effect. For this example, I’ll assume you just have the basic setup as mentioned above.
- Step 1 – Pour your base into your container. I recommend using clear school glue to start and pouring a thin layer in a cake tray or frisbee (enough to allow a disc to float in it without touching the bottom). Pouring it first allows air bubbles to come to the surface. Pour slowly and at an angle. If you happen to have a hand torch, use it to pop some of the air bubbles.
- Step 2 – Once you’ve decided on the colors you’ll use – some color theory is helpful here – now it’s time to mix your dyes. If you’re just experimenting and don’t have glass droppers yet that is fine. We’re going to mix up dye with acetone or denatured alcohol. Place each dye mix into its own cup or glass vessel. It’s not an exact science here; 1/2 teaspoon of dye to 4-8 droppers of liquid will mix up fine. I sometimes add a little water too. Like Bob says, stir it up.
- Step 3 – While those things are sitting, go wash up your new disc with a little dish soap and the magic eraser. Be gentle if you want to preserve the stamp. The Magic Eraser is great at removing the oils and fingerprints, but rub too much and it can wipe a stamp. Towel dry.
- Step 4 – Time to deliver the dye to the bed. Since we are using glue and concentrated dye mixes, we’re going to use a dropper to drop a few drops of dye in each pass. Typically I go with a eual pattern, think of how you tighten lug nuts in a star pattern. Basically, you want to drop your dye in even places, top, bottom, left, right. Repeat so you have symmetry in your bed. Add drops back into the same places you’ve added drops before. Ensure that you have a good amount of dye in all places in the bed.
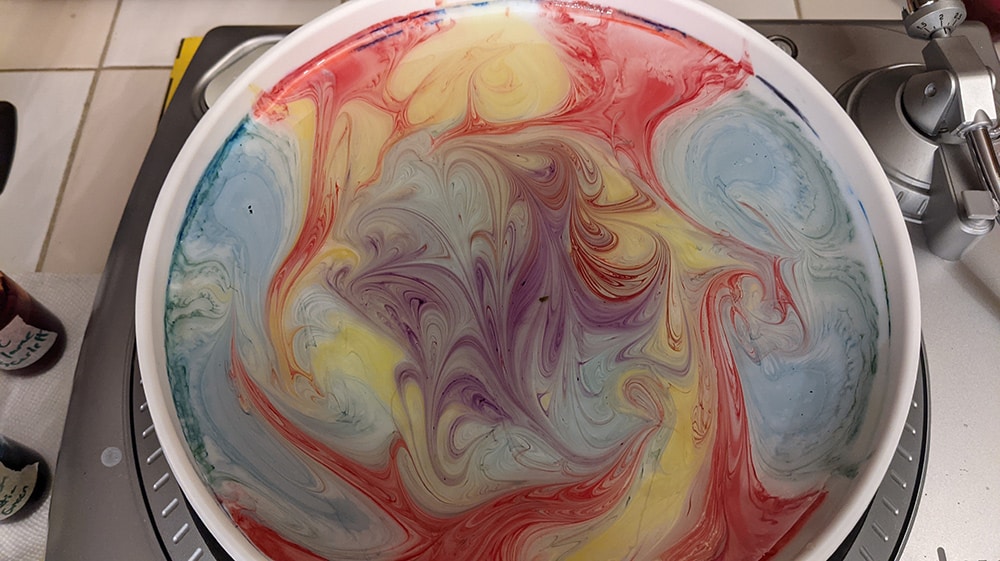
- Step 5 – Swirl it up. Physically rotating the pan, combing the top with a toothpick, using a straw and blowing the dye around. Here’s the time to get creative with your pattern. If you mix it too much you could end up with browns.
- Step 6 – Time to lay the disc down. Ensure that the disc is still clean and dry. Remove any last minute air bubbles in the bed that might have popped up. Grab the disc from the inside rim and in a smooth motion start with one edge at a slight angle dip the starting edge in first and rotate until the disc is sitting flat face down in the bed. You do it at an angle to avoid air bubbles forming. Note, this is challenging with discs that have a natural bubble top, like the Berg.
- Step 7 – Wait and Wash. If no heat is applied, wait about 24 hours to take it out of the bed and rinse with water and soap, removing residue. Be careful if you use a magic eraser, too much pressure can rub off the stamp. Admire your work!
Alternative Methods Summarized:
The Cell Swipe – Add dye to lotions/ Floetrol mix. Mix up several colors in cups. Add just a few drops of silicone oil to each (1-3). Pour into pan in layers in whatever pattern you like, or try layering. Swipe with a sheet of saran wrap plastic to activate the layering and the cells. Repeat use of bed is advisable.
Hot Dip – Typically used with stencils (see Cricut). Once pattern is weeded out of the vinyl dip into iDye Poly for short period of time to infuse the black.
Stencil – Vinyl cut and weeded to create pictures and intricate designs on discs, more time consuming, but the results can be ridiculous!
People to Follow:
The Difference is Doing It (TDIDI) – Prolific YouTuber with entertaining videos. Lots of special guests. Great for info and how to’s. Check them out at: thedifferenceisdoingit.com and at the TDIDI YouTube Channel.
YouTube – There are a lot of great videos out there, and here are a few to get you started:
So what are you waiting for? Pick up some materials and give it a try. You may be surprised at how much fun disc dyeing can be and how creative you can get with just a few basic supplies. If you’re looking for even more inspiration, be sure to check out the wealth of resources available on YouTube. With a little practice, you may find yourself becoming a disc dyeing pro in no time! Have fun and be creative!


3 Responses
Hey Ryan, what brand of “sport disc” are you buying? I’m seeing Discraft on Amazon but not sure if those are a bit too big. Lemme know, thanks!
Hi James, you’re going to want to look for “disc golf discs” as I’m not sure about dying other “sport frisbees.” If you’re looking for a good catch disc, the MVP Glitch takes dye really well. Check out the chart on this page and search for any of the company names + the plastics in green. If you’re just starting out go with white discs. Since you don’t have a lot of control on the color you receive on Amazon, eBay might be a good option.